Do you know how many times I entered a search hoping a result for stained wood board and batten would magically pop up every day for a week for a tutorial? The wall that my white electric fireplace is going on in the bedroom that is painted Benjamin Moore Tapestry Beige (aka- light greige) was going to be a big heap of blah. I wasn't spending all of our time going through months of hell reno for blah. I thought board and batten might be a nice addition on the almost 9' section of wall but I didn't want the painted version...I wanted wood and I wanted it cheap.
No big ask, right?
Literally I spent over 20 hours between internet searches, Pinterest and blog posts looking for a wood board and batten tutorial and I only found one that used what I thought could be used: lauan (pronounced lew-on). I thought using that for the back piece then wood boards and cove trim would give me the look I was going for. Well, the tutorial showed a heavily grained hot mess (I suspect because they didn't use wood conditioner before staining) and I loathe wood grain. Or at least for this purpose. Even if I could look past the whack grain, there was the wood filler issue to deal with. I'd need to cover nail holes and miter joint seams with it and after looking at stainable wood filler reviews until my eyes liquified there was not a one that had even an 80% success rate. It was more 50/50 and I wasn't going to go to all of the trouble for 50% because I'm type A and that filler is all I would see. I was about to give up this pipe dream when I remembered a product I bought to repurpose the tops of my nightstands:
Mind you, I hadn't used it yet but in theory, if I put up all of the stuffs- glued, nailed and filled and then painted the Retique It on all of that and stained it all, it should be seamless right? I even emailed my theory to the company and got an "absolutely!" as a response. Well, alrighty then.
One of the videos I saw for board and batten had them putting up Eucaboard which is a way to achieve a smooth surface on a wall that is textured. While that wall isn't textured, I looked at the price of lauan at Home Depot and clutched my pearls because I remembered it being cheaper. Eucaboard at $15 a pop it is!
Here are the materials I used for this project
Eucaboard- $30 but used $20 worth
7 1x4x10 Whitewood Board (batten) $111.10
4 16' wood cove molding $107
Wood Filler (had it already)
Liquid Nails (had it)
Brad Nailer
1 1/2" Brad Nails (had 'em)
First we measured the area which came out to 107" from the edge of the wall to the trim of the closet door. I wanted to make sure the seam where we had just under a foot we had to cut off of the second piece would be more hidden. (To be clear, the way I did this was a HUGE mistake because we were rushing and didn't stop to think things through. I will show you how we did it but I will tell you how we should've done it to not make the boneheaded mistake I'm about to do.)
We butted up against the closet trim and then it was time for the "fun" part measuring out where the outlets and light switches were.
Oh there are plenty of tutorials that tell you how to achieve this when you're putting something up on studs but no foolproof shortcut other than measuring and somehow we still ended up being off on the light switch initially. (Thankfully, before any cuts were made.) So if I had to do it over again, this is the shortcut I might use. Get some
tacky putty squares and put them at the top and bottom of what you're wanting to cut lining them up like so:
Then press the board against the wall and cut on the inside of the squares. Should give a decent bit of accuracy, shouldn't it? It might be better than chucking the measuring tape across the room. Just a thought.
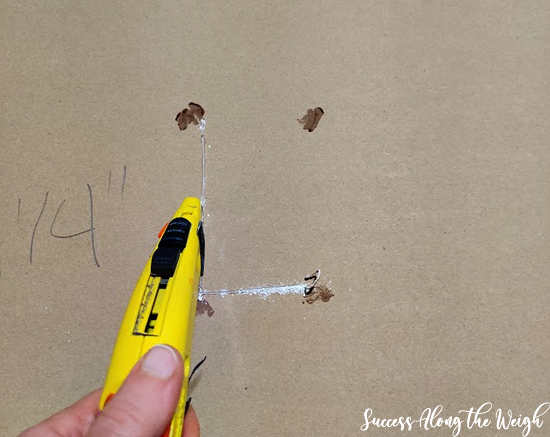
(Actually, I have since proven this thought when we were drywalling. I put the putty up kind of wadded up on the outside corners of an electrical outlet then I got some wood filler and wet it down a little and put it on the ends of the putty. It left perfect marks on the back so I knew to score on the inside of the marks for the outlet. Worked like a charm!)
So the Mr got to cuttin' with his jigsaw after drilling holes in the corners of the measurements. We slapped on some Liquid Nails after using a fancy spacer (aka- 1 1/2" of drywall stacked to line it up with the drywall that it was going against) and smooshed it in place. Then a few brad nails in the corners. I was going to do the size of the Eucaboard (48") but that's about where the light switch was for the closet and I was not down with trying to notch the hell out of a piece of wood that would look totally weird, so I decided to patch in 3 1/2" of Eucaboard on top of the full panels where the battens could attach and hopefully just clear with the cove molding. Here comes the huge mistake we made so you don't make it if you choose to loosely follow this janky design instead of a real DIY blog. How you SHOULD do it: Decide how many panels you're going to have and where they space out so that you cut the Eucaboard seam to be hidden by that instead of having it smack in the middle of your last row of panels like we did. We weren't thinking at the time, we just wanted the board out of the way so it wasn't going to get damaged or warp while in limbo. If we'd had our thinking caps on, we would've saved me some grief down the pike but we'll get to that later.
I wish I could say we did this project in succession but we couldn't because we had a million other things going on and at that point it was just about getting the Eucaboard up.
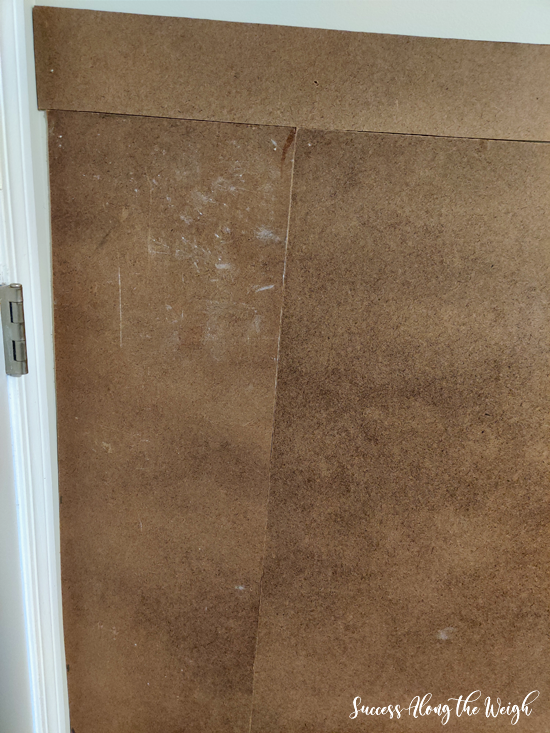 |
| (The janky disaster) |
When we were ready, I started layering on the Retique It
liquid wood. Now, if my big box store had deep enough MDF and if it was cheaper than wood, I would've used that but they didn't so I had to go with pine- which I hate aesthetically. (Not a knot fan.) In the meantime, I slapped on two coats of light liquid wood on that as well as an armoire top I planned to refinish and use their barnwood stain. I wanted to use the armoire as the tester before going to all of this trouble for the board and batten. It was REALLY light. No worries. Just slap on more coats! Four coats later and I did not care for the color of the barnwood at all for my purposes.

It kind of looked like fake 90's wood to me and that was not the look I was going for. (Keep in mind I was doing this without grain so it might look better if you use their graining tool.) For other reasons, the armoire project got scrapped but now I was in a conundrum about what do I do about the stain? 1) I didn't see a color that was close to what I wanted (chestnut) on their site and 2) you NEVER pick out a stain or anything really color wise online because they are just never the same hence the reason every website has a disclaimer about that. So the great stain debacle of 2022 happened where I got gel stain like they said but then I tested the compatible poly on some floor transitions and the lingering fumes gave me migraines. I didn't think I could have that on the whole wall where we sleep! Then we looked for the Varathane Fast Drying stain they recommend on their website. Well, I think Home Depot is the only place that carries that and they were out of basically EVERYTHING. They had four colors when it came down to it. So we're looking at the same brand water based fast drying stain but I'm not really happy with those colors either. I settle for dark walnut even though that isn't what I want. But let's hop to the next step.
So we're ready to put up the battens. In pretty much any B&B tutorial, you'll see this
wainscoting calculator that shows you how to space your panels vertically. You enter the length of the wall, how wide your battens are and how many panels you want and it does all of the math for you which is a God send. (The one drawback is it leaves you to figure out how to do horizontal ones. There may be a calculator out there for it but I couldn't find it. It seems like simple math and it should be but we were still off on the bottom row by about 1/2" which was super frustrating but by that time I did NOT care.) It should also be noted that we used 1x4's and you would think that would be the measurement you enter. Nope.
1x4's are actually 3/4" by 3 1/2" (which I knew) so I had to enter 3.5 inches for the "stiles" section. Just thought I'd throw that out there. I have no idea why places do that and yes I feel like it's one more thing we're paying for that we're not getting. Pffft! It's also very helpful to use a scrap piece of wood to make a spacer board that you can use to check top, middle and bottom as you glue. Trust me, if you get off kilter even a little bit, it'll bite you in the rump!
 |
| (Our fancy spacer) |
We started by putting down the bottom batten which would act as our baseboard. The Mr had installed wood floors and it was still floating around in the abyss so it was nice to have that secured down at that point. Then we took a construction pencil and traced around the outside of the switch and outlet plates to make sure we'd have enough clearance for the cove molding because I did not want to hot mess notch that stuff.

We JUST cleared it by putting up a test piece of molding which we used when putting up the top batten to make sure we cleared it and obviously made sure it was level before gluing and firing in a few brad nails. Now, just like Sir Mix a Lot, it was gonna be all about da butts. Butt joints, that is. One thing you will learn in a project like this is your home is built with shims, construction glue and lies. They do not care if your house is square or walls are straight. They care about pumping out a product using the biggest shortcuts possible while making it passable to your eye. So don't assume when you measure the area for one batten that it is the same for each one you'll need to put up. They can be off by a tick or two here and there which doesn't sound like much but will keep your
wood filler hand strong if you are off by too much.
It was nice to finally see it start to take shape.
Then of course, we saw that we were going to be short a few boards. We did a curbside pickup because we'd just been at the big orange machine the night before and I wasn't in the mood. I know you're picked over, just give me what you got and we'll make it work. (MISTAKE! I should've looked closer at them.) When we got all of the vertical battens installed we called it and would start on the horizontal ones to make the square parts the next day.
Again it was important to measure each and every part where the horizontal batten was going and to account for kerf on the saw as well. (
This article was super helpful about accounting for kerf. Don't ask me because I didn't do any of that part! HA!) We whipped out our spacer board and got moving.
Most fit in fine, others were wonky and required some heavy handed gap filling with the wood filler.
It should've all been easy peasy but it had a way of making it sucky wucky at times. In addition to using a level, it was helpful to get eye level with the ones being put up from a distance. Sometimes it's that hair up or down that stops you from making a wonky grid. It wasn't too long and we had them all glued and nailed in place. It was finally starting to come together though I knew we were far from done.
(*- I SHOULD HAVE POLYURETHANED THIS FIRST!!! One coat would've done wonders down the line with some frustrations so if you use Eucaboard for painting of any kind on your wall, I would poly it first with a foam brush.)
I started with a foam brush which covered well but got heavy and floppy as it progressed from the wood fibers weighing it down as they dried internally. Then I switched to the brush provided with my kit and while it did a nice job at first, it too got bogged down with liquid wood and it actually started leaving behind 'wood boogers.' I'll show you that in a minute. So I did one thin coat and by the time I got to the end, I had enough time to start all over again. I didn't paint back to the edge of the battens because 1) I was running low on light wood and 2) it was going to be covered by cove molding so I didn't need to waste it. Once I got the second coat on with the brush, it was heavily wood boogered.
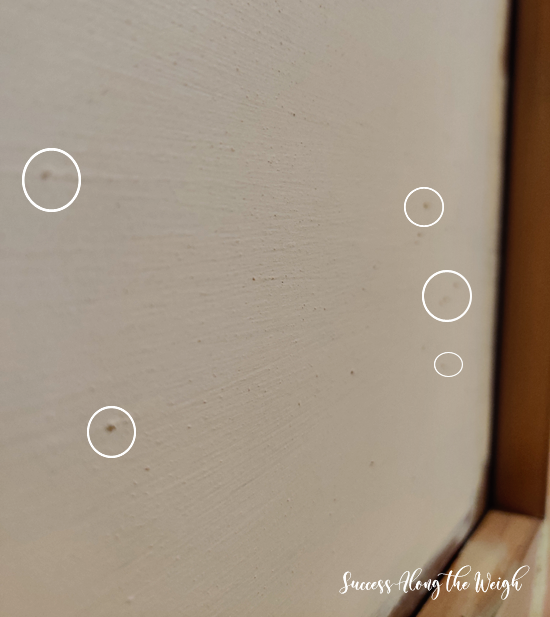 |
| (Wood boogers) |
Little bits of the wood that build up as the coats do. I didn't seem to have it as bad when using the foam brushes on the battens so personally that's what I prefer. I will say you'll blow through them pretty quickly though so I'd buy a
big ol' bag of 'em. I got
320 grit sandpaper and lightly knocked the boogers off and smoothed it. Any roughness would translate when I stained and I didn't want that. Then as I ran my finger along one of the new battens that Home Depot picked out, I got a massive splinter that went into the depths of my right index finger. That's okay, not like I need it for anything. 😒 So that told me that the boards they gave us were
not the same ones I ordered prior even though I hit "reorder" and as I could see the grain was raised whereas the ones I picked out myself were flat and smooth.
Of course I'm going to pay for trying for convenience with inconvenience of sanding with
120, 320 and 800 grit to get it as smooth and splinter free as possible. At that point, I was so high on Retique It fumes that I had to wrap it up. I slapped on a thick coat of light wood and then sanded all of the other wood filler parts at the seams and nail hole covers so when I was ready to stain I didn't have something else to do to hold things up.
The next day I slapped on two coats of
dark liquid wood on the Eucaboard and the demon pine from Home Depot. About halfway through the second coat, I started getting kind of panicky. You know how you suddenly realize how much you have riding on a project and you could potentially be sitting on a flaming bag of poo? Yeah, I was having that flop sweat moment a few times and just tried to breathe my way through it. At least with the dark liquid wood on everything, it gave a better idea of what it would all potentially look like and it was at least pleasing instead of horrifying, which is a plus. (Editing me laughs hysterically.)
It should be very obvious that we are not carpenters so when it came time to put in cove molding, it was not computing. Sadly, there isn't much on YouTube at all when it comes to this. Baseboards and crown molding all day but it doesn't exactly translate to board and batten. Thank God, we found
this video exactly for this very purpose. The Mr took notes from the video that I've attached below if anyone wants a copy, just click the pic to enlarge.
 |
| (click to enlarge) |
It took some trial and error and a lot longer than it would someone who does this on the regular but the video was the only comprehensive one we found out there that thoroughly explained it. I have to say though, once they started getting installed, it was quite exciting to see that finishing touch that made it look fancy pants.
Then I needed to see which stain route I was going to take. As you know, I really wanted chestnut but there were extra steps that would've needed taken with that and I had to compare that with the dark walnut I got. I had some scraps already pre-painted with the liquid wood so I rubbed on both stains which were thick. (Gel stain being more like a chunky pudding you had to stir up and the water based being like molasses in early March.) I let them sit for two-ish minutes then wiped them up and let them dry.

As you can see, with the dark wood Retique It as the final two coats, there wasn't a significant difference in color. The dark walnut on the right was only a hint darker and I could live with that. Now it was just a matter of being able to actually stain because as our luck would have it, we were way short on the amount of cove molding needed. When I looked to get more of the same, do you think the big orange machine had it? Of course not. So we had to switch to MDF and pray there wasn't a noticeable difference. I'm not going to lie, the first two layers of light liquid wood made my butt pucker a bit because they went on streaky and I feared I'd need to sand. But with the third and fourth layers of dark wood over them, it all evened out. So lesson learned, just go with the MDF if they have it in stock. (If I remember correctly, they only had a few beat up pieces of it the first time we got it which is why we went with wood.) But I will say this, SAND MDF first. While they claim you don't usually have to sand what you're painting after four coats it seemed pretty smooth but after cutting and installing, some chips happened and it doesn't touch up well with that slicker MDF coating so a light scuff should do the trick.
At this point, the only thing left to do was stain it. Given the results above, I was so confident that I started with one of the most visible squares in the room because obviously.
This was the moment of truth. If it didn't work, I had NO plan B.
Swing back by Wednesday to see how it turned out! (I know, I'm sorry but this post is already so long that I'm sure many of you didn't even get this far. I've got lots more to spill! Literally. 😆)
====================
Follow me on
Bloglovin. Some posts may contain affiliate links that help keep this blog running at no cost to you. See the
Disclaimer page for more info.


I was quite happy with how it looked even in the early stages and I knew that no matter what it was going to look great. It adds so much character to an otherwise boring wall and this is the wall we look at most of all in the room.
ReplyDeleteGreat work! Thanks for the detail as I want to add b and b to my entryway
ReplyDelete