Y'all. I don't know at what point during the planning phases of this remodel I was like "I want an electric fireplace in the bedroom" but there it was and wouldn't leave mah brain. I think it was once I realized we were able to get rid of our big ass Crate and Barrel dresser and that would open up the wall in front of the bed and I thought "ooh, it'd be nice to have a small fireplace there!" I looked several places and finally settled on the Chateau Fireplace from Wayfair in white. (
This is the one we got but they also have one
in Espresso. It's been over a month in use and we friggin' LOVE it!)
It was 41" long which was the perfect size and seemed to get the best reviews. Honestly, I wanted it more for ambience and didn't plan on using the heat option much, if at all because I am a hot sleeper after an hour and don't want it stifling in there. As I sat on Mt. Midoriyama (aka my
mountainous bedframe which allowed me to put all of the contents of my closet under the bed), I thought "uh, I don't know that I'll be able to see the fireplace from the summit." That lead me to some very scientific calculations to see how high I'd need the fireplace to sit to see the firebox.
That's right. I based my measurements of what a platform would need to be based on a janky setup and where I could see the top of the bottle from sitting up in bed. Follow me for other DIY tips and tricks.
So I did my calculations based on the height of the base according to some answered questions on the site and determined that if we built a little base out of 2x8's then it should be the perfect height. We had leftover stone panels from the accent wall that I could put on the front and sides and it would turn it into a true mini hearth! I was excited about this and the Mr probably broke out into a flop sweat.
Here's what I used to build it.
Two 2x8x8 (Remembering that that they're really 1 1/2"x 7 1/2" 😒)
Two sheets of plywood (or one big one- we don't have that kind of car room.)
Leftover stone panels
Leftover cove molding
This is the template I gave the Mr:
 |
| Diagram is looking down on it. Click to enlarge |
Here's what it looked like in reality:
This was before securing everything to see how it looked. I couldn't help myself as I'd had this idea all along that I scrapped about putting a hole in the middle with firewood in it. Look, I know it's not a real fireplace but there is something about having firewood as decoration that I love. (I've got a bundle of birch logs in a crate in front of our gas fireplace and it works.) I could either have him screw this together as is and put the stone across the front or I could go for it, get the firewood I wanted and would always whine about if I didn't do it. Hole in the middle it is.
He cut the long piece so it would only cover the two middle supports on the front and leave the firewood hole.
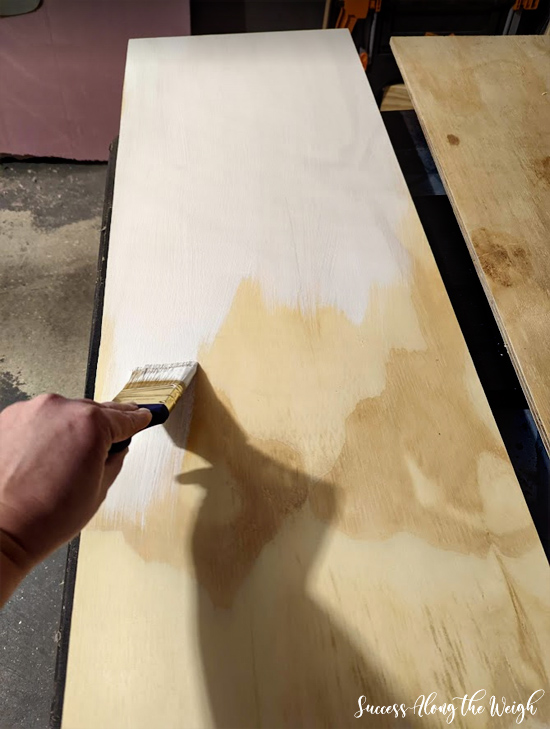
He cut plywood to cover the top and bottom and that would get us back to the 8" height but first it needed to be sealed. Plywood has formaldehyde which I have extreme reactions to so I can't have it outgassing at any level in the house. (The great eye soak of 2015 after having cheap laminate installed still makes me cringe.) So primed them with
Bin Primer on the top, bottom and sides.
*This is where I had a brain fart & apparently didn't take more pictures of the building process.*
Then I worked on the rest of it by using the
Retique It Wood n' Stain on the primed top. Of course after one coat it was the exact color I wanted for the board and batten but I'll try not to think about that. I painted the cove molding the same color but a little darker. Then it was time to work on the stone panels the Mr cut. I did the same aging technique I did on the accent wall with the watered down joint compound blotted on the surface and when it dried I lightly rubbed
dark wax. I used the stone touch up paint I bought from the company when I ordered the panels to paint the sides of the cut pieces so when they showed it wasn't super obvious. Then I grabbed the
lightweight spackle, chucked it in a gallon bag and cut the corner and piped it in just like I did on the stone wall.
I pushed it in and tried to smooth it with my finger which is next to impossible. So after about 30 minutes when it started to slightly crust over, I dipped my finger in water and smoothed it which I WISH I had done with the wall because the texture really bothers me but it works. But you can see the difference with smoothing and not smoothing. I had to let it dry overnight before I could paint the grout Benjamin Moore Tapestry Beige to match the wall. Then it was time to assemble it. We got some construction glue and put the sides on and then the front panels and let the glue set.
Then we glued on the top and bottom and let those dry. Next we put the cove molding on the front bottom of the hole for a finishing touch. Finally it was time to put the firewood that had been cut to fit inside to see how it looked.
We were both really happy with how it turned out and it perfectly complimented the fireplace.
It's awesome that my janky little bottle trick allowed me to have the view I hoped for when sitting in bed!
I know you can't see the hearth from bed but that wasn't the goal. We just wanted something snazzy to give us the view we were after.
====================
Follow me on
Bloglovin. Some posts may contain affiliate links that help keep this blog running at no cost to you. See the
Disclaimer page for more info.


Beautiful creation!
ReplyDeleteI am so glad we did decide to do the extra firewood hole because I think it adds an extra element to everything. I honestly think it would look wrong without it and I love how it gives some more authenticity to the whole thing.
ReplyDeleteIt looks fantastic! All the elements came together beautifully. Definitely like the addition of the firewood area.
ReplyDeleteWell done! That looks beautiful and cozy like something you would find at a high end B&B.
ReplyDelete