It's time for the triumphant conclusion! If you haven't read part one,
click here. I'll wait.
*Muzak version of Girl from Ipanema hold music*
Where were we? Oh yeah, moment of truth. So I used the foam brush and started my 3 minute timer as the instructions on the stain said. This was the Varathane Stain which was water based, fast drying and thick. I noticed it looked like it was drying quicker than anticipated so I wiped it off a minute earlier. I wasn't going for super dark so I was hoping for just one coat. I got my stain rags and began wiping away. My heart fluttered as I revealed the cove molding in its glory. This was going to be gorgeous!
As I continued to wipe away the stain on all sides, my flutters turned to palpitations as a big blotch of stain completely removed from the wood batten and the center panel, well, looked like this:
Fair warning. As if you couldn't tell from the previous post, there's gonna be language. If this offends you, don't let the door smack you on the ass as you head to a real DIY blog. I'm telling you the TRUTH and giving you the potential ugliness of DIY and what you could encounter if you're born under a bad star like we seem to be. I've got no time to polish a turd so you can say "it looks easy! Let's do it!" If anything, I'm cracking those rose colored glasses so you can slap on a pair of readers for the up close of DIY dumpster fires. If this all sounds like fun to you, then hop in ya lunatic but you do it at your own risk. I warned you. Also, I'm old and therefore I like gifs because they make me giggle. There will be many. As you were.
"Okay. Don't panic. You took a risk using a water based stain, you can seal it and go over it with the last of the liquid wood you have." I went on to the gel stain which was the top recommendation from them over their own stain. (I didn't use their stain because I wasn't crazy about any of the colors.) I grabbed the next foam brush, used it in the gel stain and put it across one piece of wood and one middle panel in a spot that was going to be covered by the fireplace in case the shit show progressed.
And progress it did.
Two! Two f**ked up squares! Ah...ah...ah!!
I text the Mr in the other room. "Sh*t show."
He comes in, is perplexed but also trying to say the right thing so as not to send me down the mental toilet swirl that has been the previous few days months. He agrees it looks like crap and it's clear the Eucaboard, despite FOUR LAYERS of liquid wood, does not play well with others. It's not like it's glued to the wall with super sonic construction adhesive or anything. 😒 I emailed the Retique It peeps and in the meantime, did a furious internet search of which I read in several places that you need to shellac the stain to start over. Okay fine. The Mr and I walked at the park that night and he dropped me off to start dinner while he got shellac. Then a few hours later I entered a search "what does shellac do?" and it came back with never use it around a heat source even when dry.
FML.
I told the Mr and I could tell he wanted to temper his response with the extreme frustration he was now feeling at wasting yet more money on this project but not sending me into a crying jag. Too late. I spent 4 hours looking at varying brown paint colors which I didn't want to use while talking to myself out loud but also wanted it to look like wood. Well, brown paint ain't gonna make it look like wood. It's too one dimensional and if you try the many paint techniques that tell you that you can, it looks like pure dung to my eye. I was told to poly it because shellac could cause adhesion issues so take note if you ever use it. They were very helpful but at this point it was two days from vacation and no packing or anything remotely close to preparing for it had been done. We had to call it. So I made it my goal to get it back to square one and I polyed and did the two layers of light liquid wood and two layers of
dark liquid wood.
I looked at more paint colors than I knew existed but also knew that was essentially futile because that nice "off white" chalk paint that was my first purchase for this God forsaken devil project was white. Just plain ol' white despite the website talking about how creamy it was but not actual cream.
I looked on Retique It's website and saw they had a product called Wood n Stain. I really did NOT want paint. I wanted wood look. I was confident I was going to get it and it was obvious that wasn't happening the traditional stain route. This stuff was liquid wood, stain and topcoat all in one. You don't wipe it off. I cannot tell you how many times we went back and forth as to whether we should invest more money in that stuff. As I was bawling asking the Mr what HE would do and he said he would get the little 8 ounce one and try it first on some scrap I have painted to see if it would work or not before investing in a $170 GALLON of the stuff. That sounded reasonable.
There was more back and forth the next day. A lot of sobbing. I'm sure a lot of the Mr thinking "she offered twice not to go on the vacation so I could celebrate my birthday in peace, it would be rude to turn her down now." A lot of me looking at customer pics of projects using the stuff and recoiling in horror at what other people consider "looks so real" and a patchy hot mess on varying surfaces. In the end, I decided to give the product a try and hopefully being away for a little over a week would give me the recharge I (we) needed to put dis bitch to bed when we got back. So I sealed the stain with poly added my layers of liquid wood (that I was now out of) and got it looking like it did prior to my dreams being smacked with a leather glove across the face.
I ordered the smallest jar of Wood and Stain in Dark Walnut. It was not the color I would have preferred but I didn't like any of the other ones. They don't really have 'medium' tone browns. I'd already tried Barnwood which looked medium toned to me on the website but it wasn't on my project. I told myself I was doing one square for a test and if I didn't like it, I was going to poly over it again, paint and call myself beat. I didn't have the mental or actual time to swirl this toilet anymore.
I was fresh off of vacation mode so I didn't think to grab the camera for the layering portions. I put on one layer which is what I was hoping to get away with because I didn't want anything too dark. It was apparent that isn't how that works on a large project. It dries VERY fast and if you're not going in the direction you want the final product to go, the edges will have already dried in that pattern. Or even if you paint a small section, if it even touches a section that has started to set, it will be uneven where you picked up, like so:
 |
(The kicker? The one coat color is the color I wanted but there's literally no way to get it on a project this large.)
|
On a small project like an end table or nightstand, I might've been able to get away with it but not for a wall of this stuff. (Edit: This theory was confirmed with a smaller project.) I waited and applied the second coat about an hour or so later. Obviously, it made it darker and filled in some of the wonky patterns made by the first pass but it was quite clear this was going to be a three coater for it to be close to what *I* expect it to look like. (I emphasize I because there were plenty of pics in the Amazon reviews where people who were thrilled with their results made me recoil in horror and I knew I couldn't live with splotchy, streaky or heavy brush strokes. If you're from the school that stained wood is supposed to look uneven then 1-2 coats will do ya.)
With each coat, it all got darker (I needed four total for it to not look streaky) and I basically ended up with a $200 gallon of coffee brown paint that I could've gotten for $40. This is not necessarily the fault of the company. There are tons of reviews of people who like seeing brush strokes or use the grain tool to get the real wood look. Like there would've been people who looked at the above pic (aside from the darker square) and called that a success.
I am, unfortunately, not one of those people.
Okay, so time to break out some
dark wax and see if it can give it a little depth.
I lightly dabbed into the wax onto
my brush then put it on every square inch going first in circular patterns then up and down and left to right.
Once it was done, it did give a little richness to things after I took off the excess wax with a lint free rag.
I waited 24 hours and went back with a clean
lint free towel and tried to buff it to a sheen I liked. Then the cosmos struck again.
Flecks and edging of the wood n' stain started coming off down to the core. Well, knowing I had MDF down the wall for cove molding meant that wasn't going to happen or I'd have to repaint. I thought this meant it was a sign from the universe that the idea to have to put
Rub n Buff on the edges of the cove molding with a Q tip was not just an idea but now necessary. I did not take pics in case this part went in the toilet and let's just say:
I called the Mr in to tell me what he thought and he stood there in silence then crossed his arms. (aka- "how do I say something without her blowtorching this wall?") He didn't love it and I asked if my original idea of mixing Rub n Buff in with the
dark wax and putting it on the cove molding sounded better or just paint it. He said yes and to do one square and see how it looked.
So I took a wee scoop of
dark wax and
Rub n Buff and slapped them on the back of whatever was handy (used sandpaper backing) and mixed them together.
I took a little bit on my finger and ran it across the cove molding on all sides. I called the Mr back in before I did any more and he said he really liked it and to proceed. So I did.
 |
| (That was before evening it out a little but you get the idea.) |
Then I declared myself done because I wasn't ever touching that effing wall ever again unless it was to demo it.
Lest you think we went full on disco in there, it doesn't look remotely that shiny in person on the molding. It catches just enough light to give it the depth needed but not as reflective as shown above under the glaring ceiling fan light.
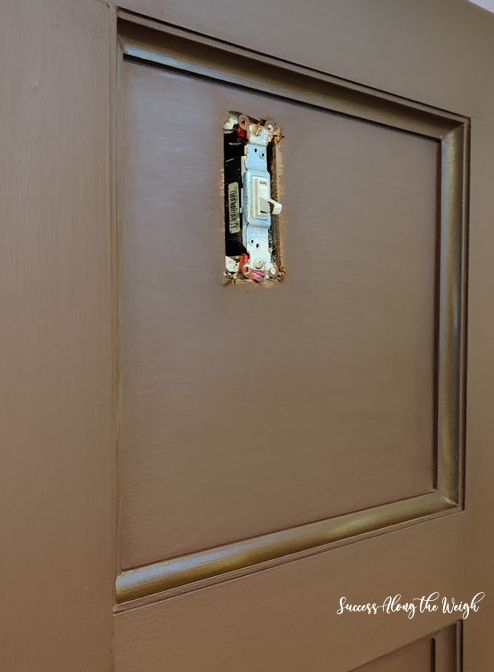
Then it was time to throw on the outlet covers and get crackin' on the rest of the room which instead of being ready for early September, was ready for Christmas.
Is it what I was originally going for and the color I wanted?
But I had to work with what I had and what I was mentally able to tackle. I do not have the patience or 'go with the flowedness' that is required to work with a stain like product. Lots of reviews of people who love the stuff and swear by it and I would trust them more than I trust my experience. It's growing on me but it will always stick in my craw that I couldn't seem to get the color I wanted once I put all of my eggs in one product's basket. I think if you want really dark wood (gray or lighter 90's looking wood) then you're good to go with Retique It and I would use the Wood n' Stain product just to save your sanity and not have to do so many steps. (Again this was my first time using it so I blame inexperience, not the product.)
If I had it to do over, I would probably poly then prime the Eucaboard with Bin 123 Primer and use the Chestnut Gel Stain I wanted but wasn't compatible with the liquid wood. In the end, it does look similar to the inspiration place I used- Haddon Hall.
At this point, that's all I can ask for and to not shoot a fiery arrow at it whilst facing it laying in bed remembering what it took to get me to "not even close, bud." But as with DIY projects past, I know there will come a time that I won't hiss at it as I walk by. Knowing one year, like birth, it's a 'pain you forget.'
I'm still waiting.
====================
Follow me on
Bloglovin. Some posts may contain affiliate links that help keep this blog running at no cost to you. See the
Disclaimer page for more info.


I was bummed you couldn't get the actual color you wanted but I have to say I did like that little extra something that the rub n buff added for some depth. I love the way it looks and am proud of it.
ReplyDeleteI love it, not exactly what you wanted but still gorgeous.
ReplyDeleteDefinitely a hard won battle.
Sometimes I just say to myself "better than it was" to accept my result.
Have a very Merry Christmas 🎅
The color really did turn out well and it has a lovely smooth look to it and a real depth of color. And in the end the project did not break you -- came close, but you wrestled that bear until the very end and look how incredible it looks now! Battle scars, my sweet, battle scars. A scar means you survived!!! xoxoxoxo
ReplyDelete