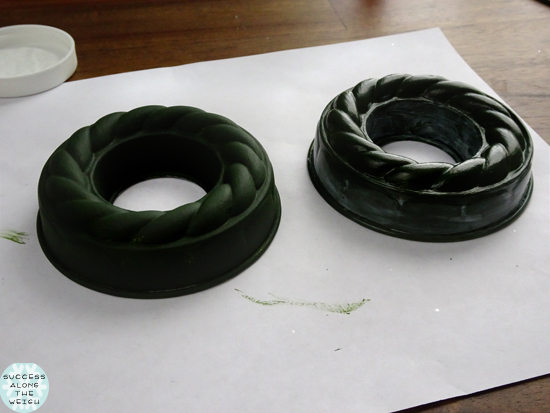
When we were on a road trip, I spied a set of round, roped vintage tins. I gasped and yelled "WREATHS!" and given I was in the midst of Christmas on the brain (in July), this was not unusual for me to be seeing all things yuletide. At $.50 a piece, my conscience wouldn't allow me to leave them. I picked them up, squeed and walked around with a big smile plastered on my face just so I could bring you these:
Here's what you'll need:
Roped mold tins (antique stores usually have plenty or ask your mom or gran!)
Green paint
Small paint brush (I thought a sponge brush would work better, it didn't)
Scissors
Heavy duty glue
Mod Podge (affiliate link)
Small red ribbon (for bow)
Larger red ribbon (to hang)
Hello you lovely little bargain! I'mma make you purty again! (Not that I am vintage "shaming!")
Time to break out the paint!
It's easiest to paint the inside first. (I ended up picking it up from the inside of the tin)
Paint on top and all the way around the edges.
After one coat, you'll look at it and say "well, that was just wrong."
Don't worry, with each coat, it gets more opaque (though if you like that kind of rough, transparent look, let your uniquely you flag fly!)
I did 3 coats total. While those are drying, time to make bows for the wreaths!
When the paint is dry, it's time to seal it with Mod Podge. I did the whole thing but if you wanted contrast you could certainly just paint the roped part only. Just be aware anything not sealed can get nicked quicker.
You can see the difference between the matte finish on the left and the dried Mod Podged version on the right. (At least the top)
This one is totally dry. See...nice sheen to it and all protected!
Grab your glue and put a dab on the back of the bow and adhere it to the bottom on your wreath.
Woo hoo!
Now time for hanging ribbon. Cut about 1-3" more than you think you'll need so you can adjust to where you're going to hang them.
Tie a knot, a bow, whatever you like!
I have these weird gothic church window cut outs that always look like they need something and these babies were perfect!!
I loved them so much in that spot, I think they'll stay home on there to spruce things up!
* This post contains an affiliate link
====================
Like this post? Don't miss another one...subscribe via email or RSS feed. (Or you can follow me on
Facebook )


Vintage Shaming, LOL. I was impressed with the way these turned out and I love the way it looks in that spot too.
ReplyDelete